Welcome to Lesson 4 of the Jazz Chords Workshop.
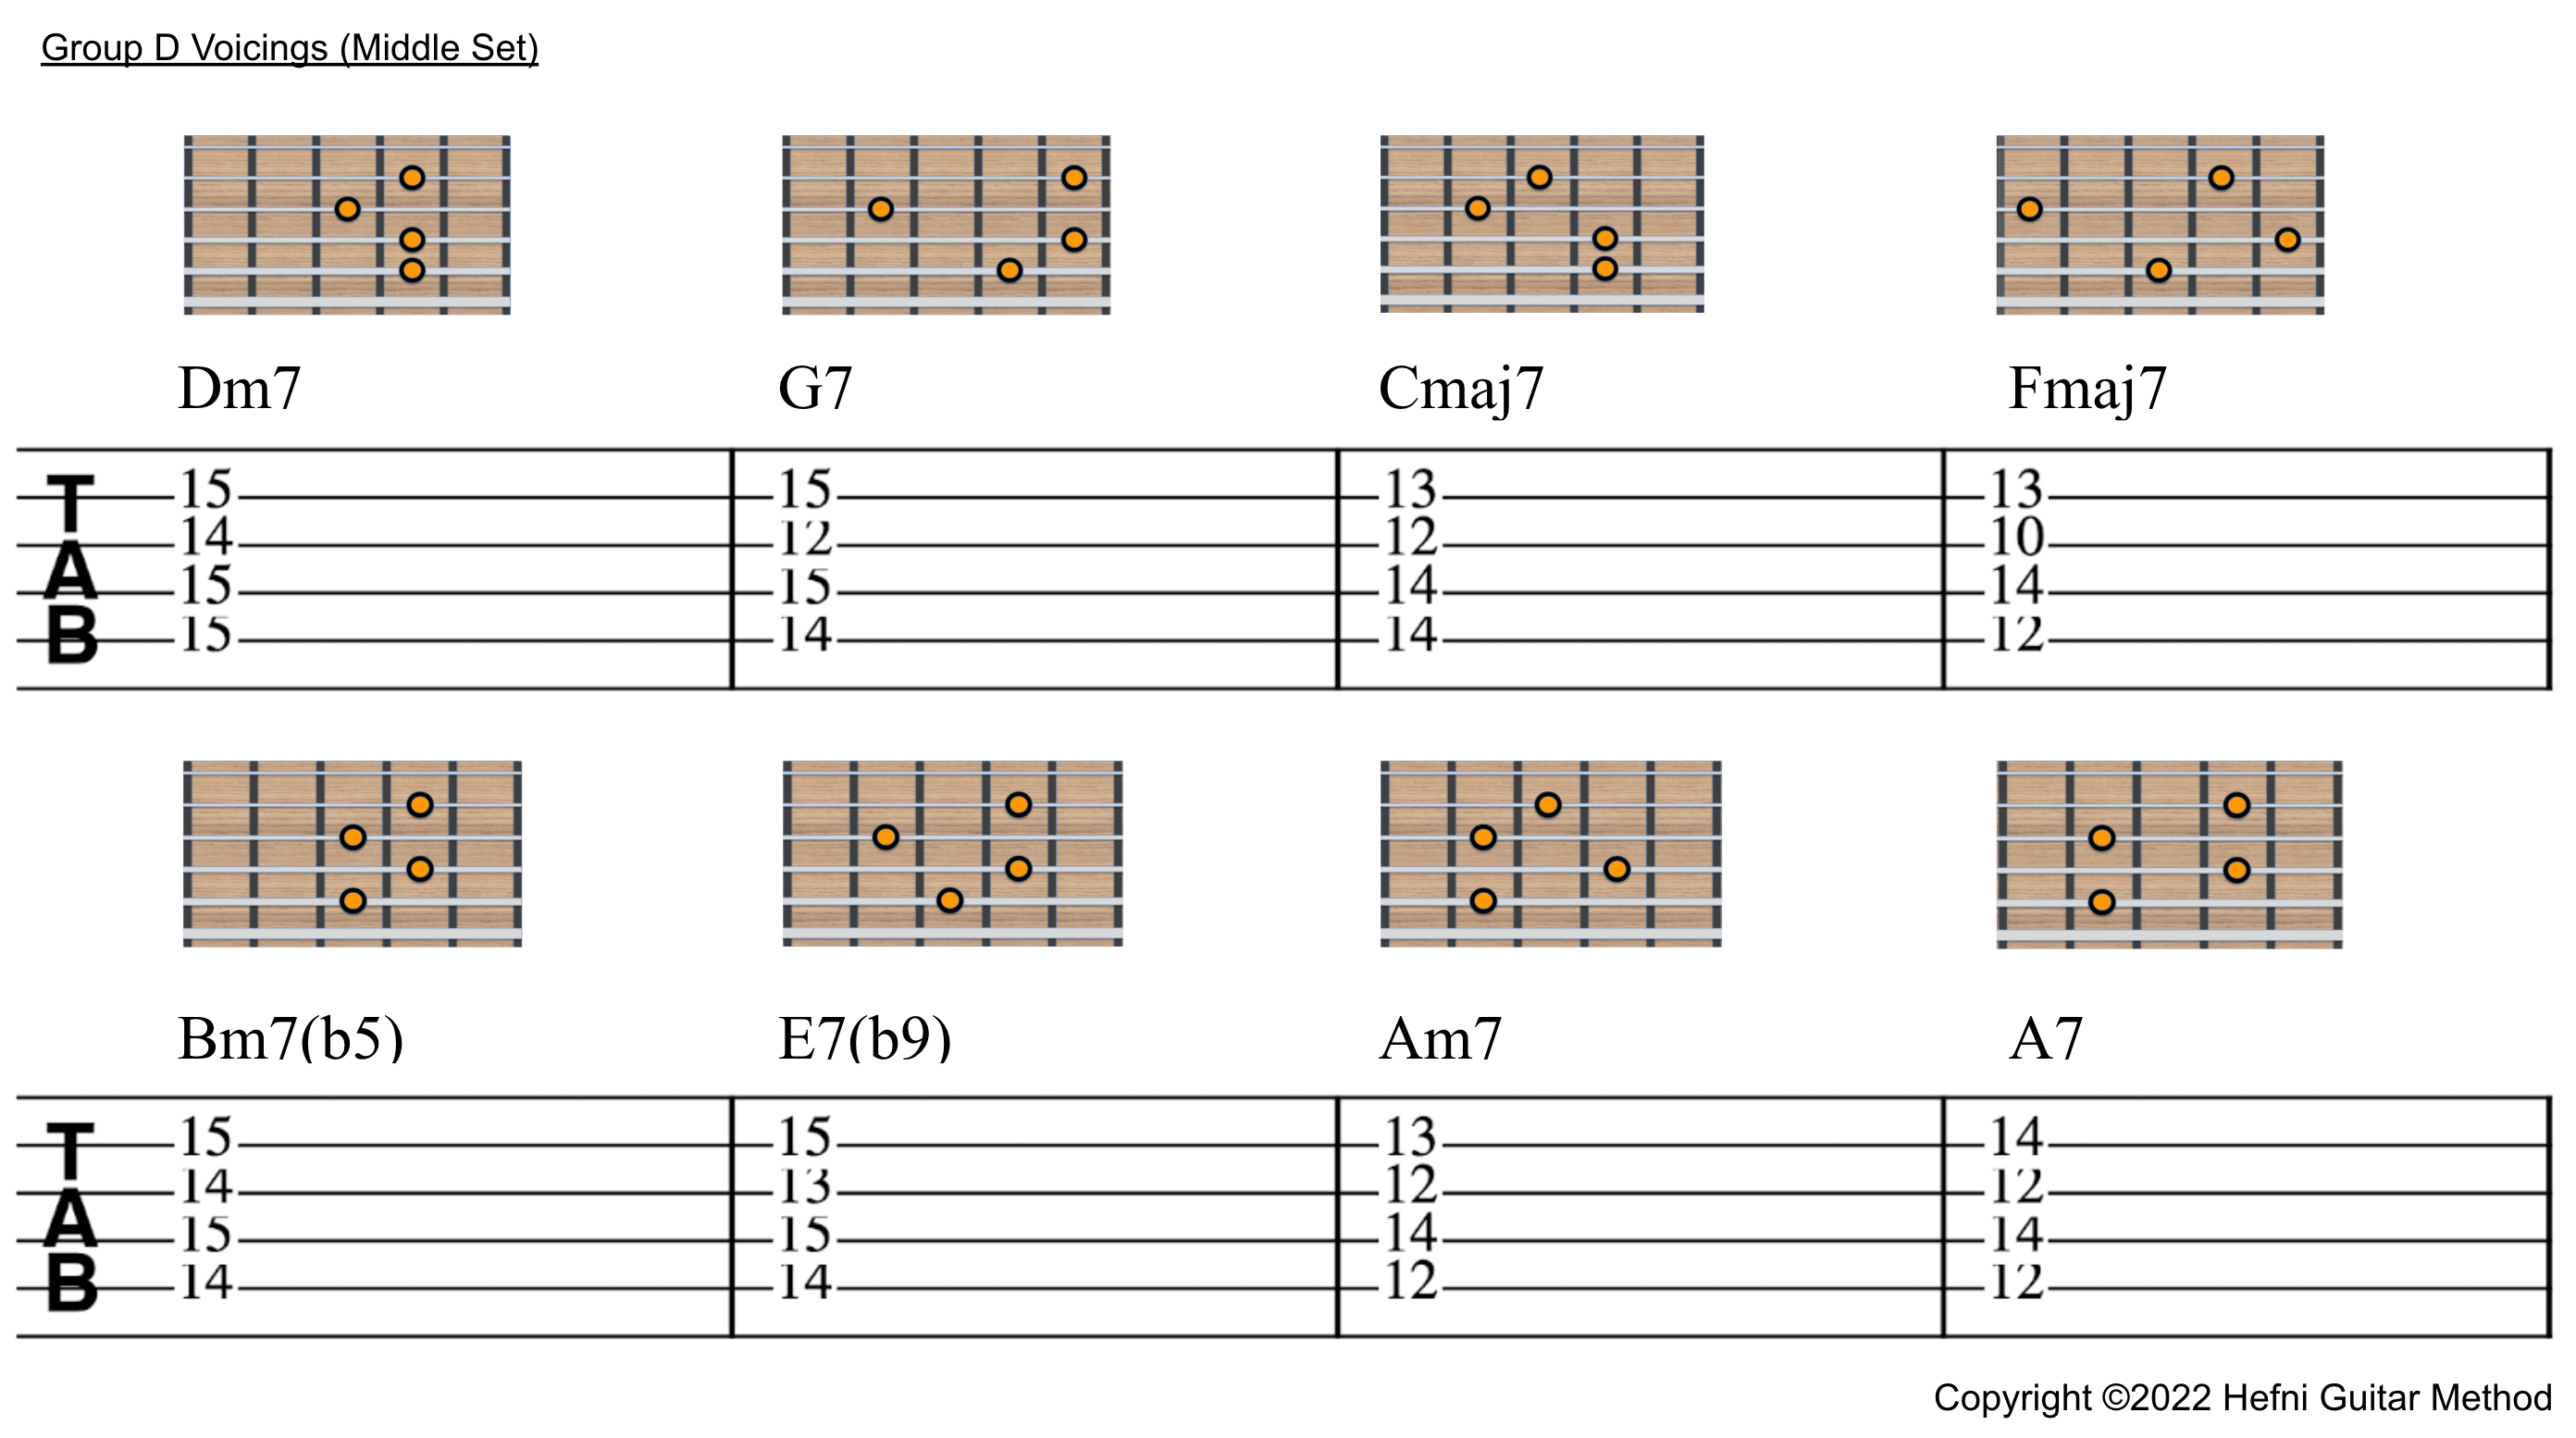
Lesson 4 introduces the next voicing group for the middle group of strings centred around the 12th and 15th frets. I call this Group D Voicings. This is the final group of voicings for the middle four strings. By the end of the lesson, you will have learnt all the possible voicing variations for the foundational 7th chords.
Learning Aids
The chord shapes and TABs are as follows.

Primary Takeaways
The main takeaways of lesson 4 are as follows:
1. The final voicing group for the middle strings.
The voicings in this lesson complete the 4 different ways you can play each of the 7th chords. The chords in this course use strict ‘Dropped-2 voicings’. It is not necessary to know what dropped-2 voicings are, nonetheless it is more important to know how to use them. If you are interested to learn the theory, I will cover this in greater detail under the music theory course.
2. These voicings are transposable down one octave
Group D Voicings are presented here starting on the 13th fret, instead of in the octave below. It is easier to chord up here because the fret spacings are narrower higher up the neck. Once you have mastered the changes, try playing them one octave below (i.e. 12 frets down). You might have to contend with the big stretches but ultimately the voicings are the same.
3. The E7(b9) shape doesn’t change
By now, you would realize that the E7(b9) chord in bar 6 always retains its shape regardless of voicing group. This makes it easier to remember and apply this chord in the context of a minor II-V-I. Closer examination will reveal that these chords are exactly 3 frets apart. In other words a minor 3rd apart. There is only one other chord that does this and that is the diminished chord. More specifically the Diminished 7th chord. We will revisit the Diminished 7th concept after completion of the entire course. For now, just know that a dominant 7(b9) chord is also a diminished 7th chord.
Tips for better learning
As an educator, I find it useful to recap what we’ve learnt at regular intervals. By the end of lesson 4, we have explored:
1. Breaking down the lesson to manageable fragments and combining later
2. Practising in the ‘dark’ (or without relying on our eyes)
3. Concept of learning by doing (i.e. playing)
4. Finding ways to continuously motivate ourselves to continue learning.
In this lesson, I would like to introduce the concept of self-monitoring your learning. To improve our learning, we need to always gauge ourselves as to whether we are improving or not. Simply put, if we are not improving, we are stagnating.
If we are not aware that we are stagnating, we may be stuck at playing the same thing over and over mindlessly. Conversely, by having a system to check our progress, it will indicate to us we’ve mastered this exercise and that it’s time to learn something new.
I suggest setting a ‘benchmark’ of sorts to check your proficiency. For instance, if you are able to play the entire 8-bar progression 3 times consecutively, then I would say you have mastered this exercise. The 3 cycles should be played perfectly on time and with no mistakes. Additionally, I suggest that if you happen to make a mistake, stop and restart the entire exercise. I set this standard for myself throughout my whole guitar playing career and it has served me well. Henceforth, I suggest using this 3-cycle standard for every lesson in this course before proceeding to the subsequent lesson.
Of course, you may choose to set your own benchmarks but the takeaway is to have a benchmark to gauge yourself.
Til next time.
