Welcome to the Blues Chords Workshop Lesson 4.
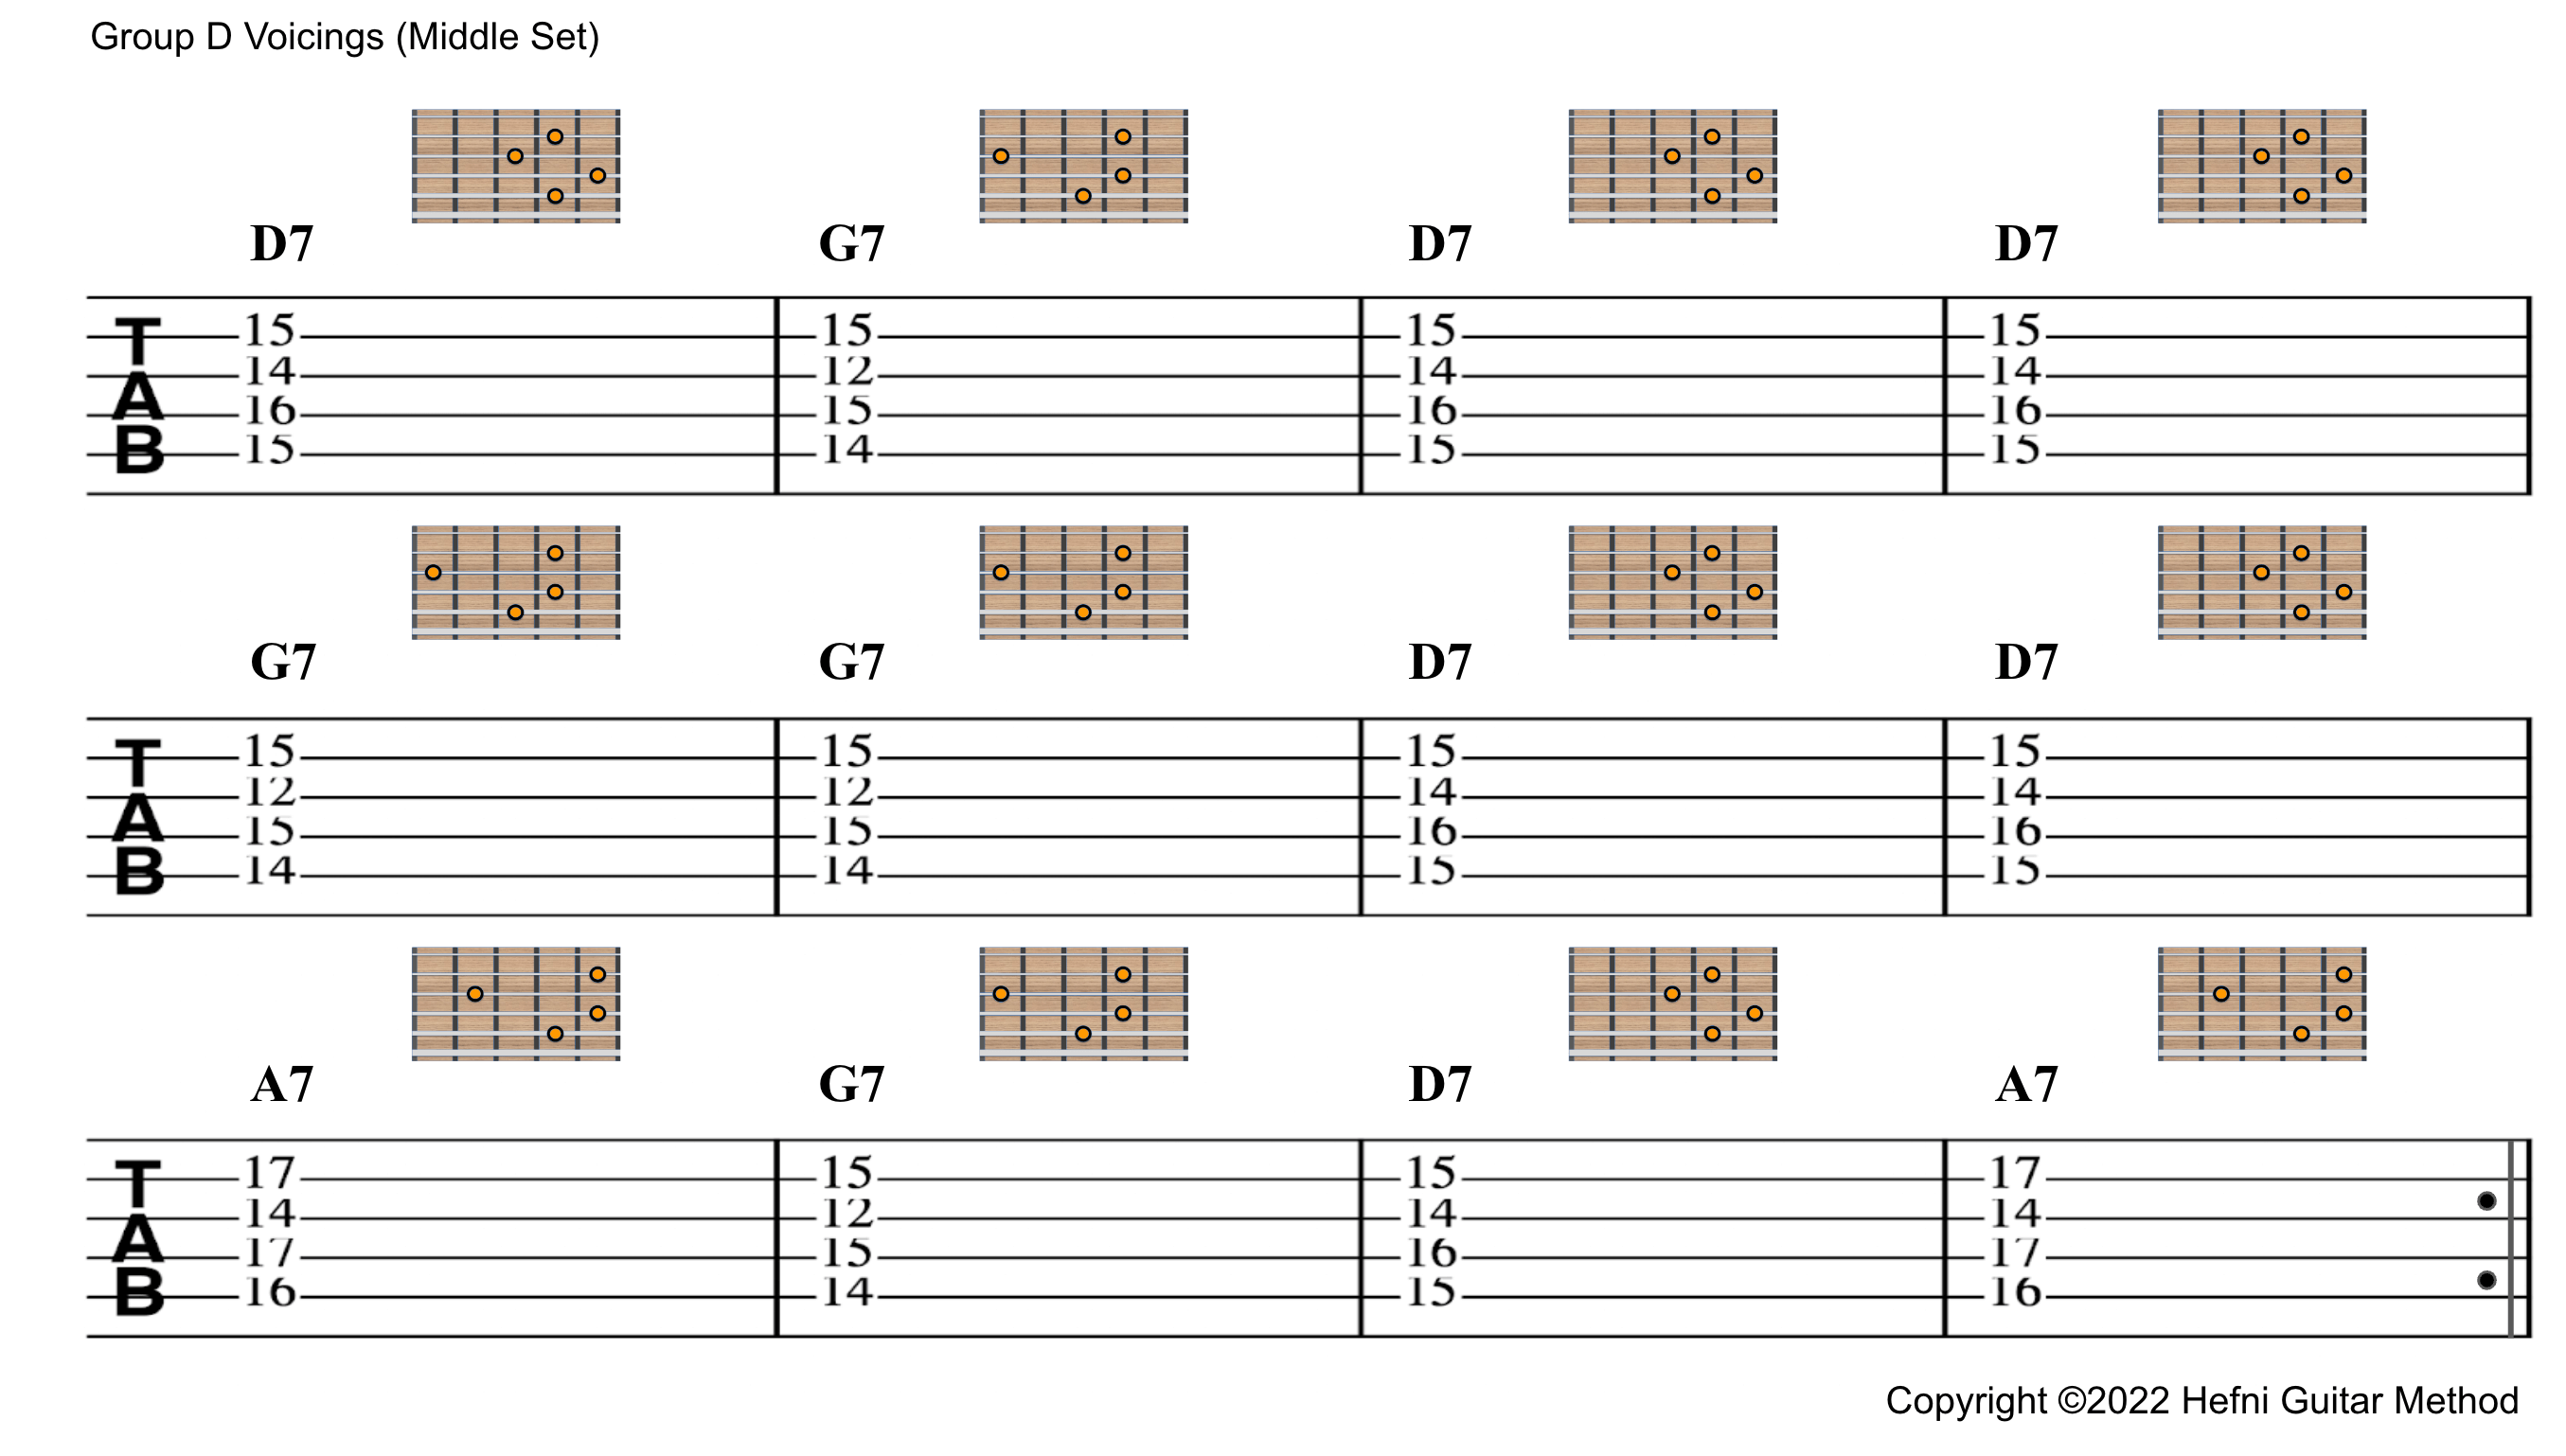
In this lesson, we will explore the next group of voicings on the middle strings between the 12th and 17th frets. Similar to last lesson, the chord voicings used in this week’s lesson would be familiar to you.
This week’s chord shapes which were first introduced in lesson 2 except that we will be using them at a different fret and in a different order.
As before, these voicings maintain proper voice leading when changing the chords. Also they allow the use of the common finger techniques such as ‘fixed pivot-‘ and ‘movable pivot’ fingers. Let us call this week’s voicings as the middle structure of Group D Voicings (for Blues).
Click on the video below to watch the lesson.
Learning Aids
The TABs and chord diagrams for the Lesson 4 are presented below.

Primary Takeaways from Blues Chords Workshop Lesson 4
The main takeaways of lesson 2 are as follows:
1. Exact same chord shapes as Lesson 2 (Group B Voicings)
The chord shape for the I chord in this lesson is that for the IV chord in lesson 2. Hence, this shape should already be familiar to you. Similarly, the IV chord shape in this lesson is that of the I chord in lesson 2. Likewise, changing between the 2 chord shapes should also feel familiar.
2. Common Finger Technique: Fixed Pivot
To change from the I chord to the IV chord in this lesson, the fixed pivot finger will be your middle finger. This finger should be pressing down the C note on the 5th string 15th fret. Keep this finger pressed down on the string when changing the chord fingerings.
3. Common Finger Technique: Movable Pivot (optional)
Once you have a fixed pivot finger when changing chords, this should provide adequate stability. However, as you get better with the changes, you might find that your first finger can also be a movable pivot. In the I chord, the first (index) finger should be pressing down 3rd string, 14th fret (A note). Therefore, when changing to the IV chord, slide this finger 2 frets down the string to the 12th fret. Hence, by sliding the finger along the string instead of lifting it off the string, we are using the least amount of energy when changing the fingering. Clearly, this maximises the efficiency in the chord changes thus faster fingering changes.
Tips for Better Learning
Mapping the fretboard
Although it may not be apparent at this point, our objective for the chords workshop if to map the fretboard in terms of the chord tone locations. To map the fretboard for chord tone soloing, we shall map the chords first and then we shall mapping the scales. The latter will be done in the subsequent course on guitar scales workshops.
There may be some learners who might be interested only in learning the chords and not the scales. Be that as it may, by the end of the chords workshops, you will have acquired adequate knowledge for your desired outcome at the chords level. However, if your desire is to develop proficiency in chord tone soloing, you will ultimately need the scales component. As this will require completion of the scales workshop, you will have to be patient. Remember Rome wasn’t built in a day.
