Welcome to the Blues Chords Workshop Lesson 2.
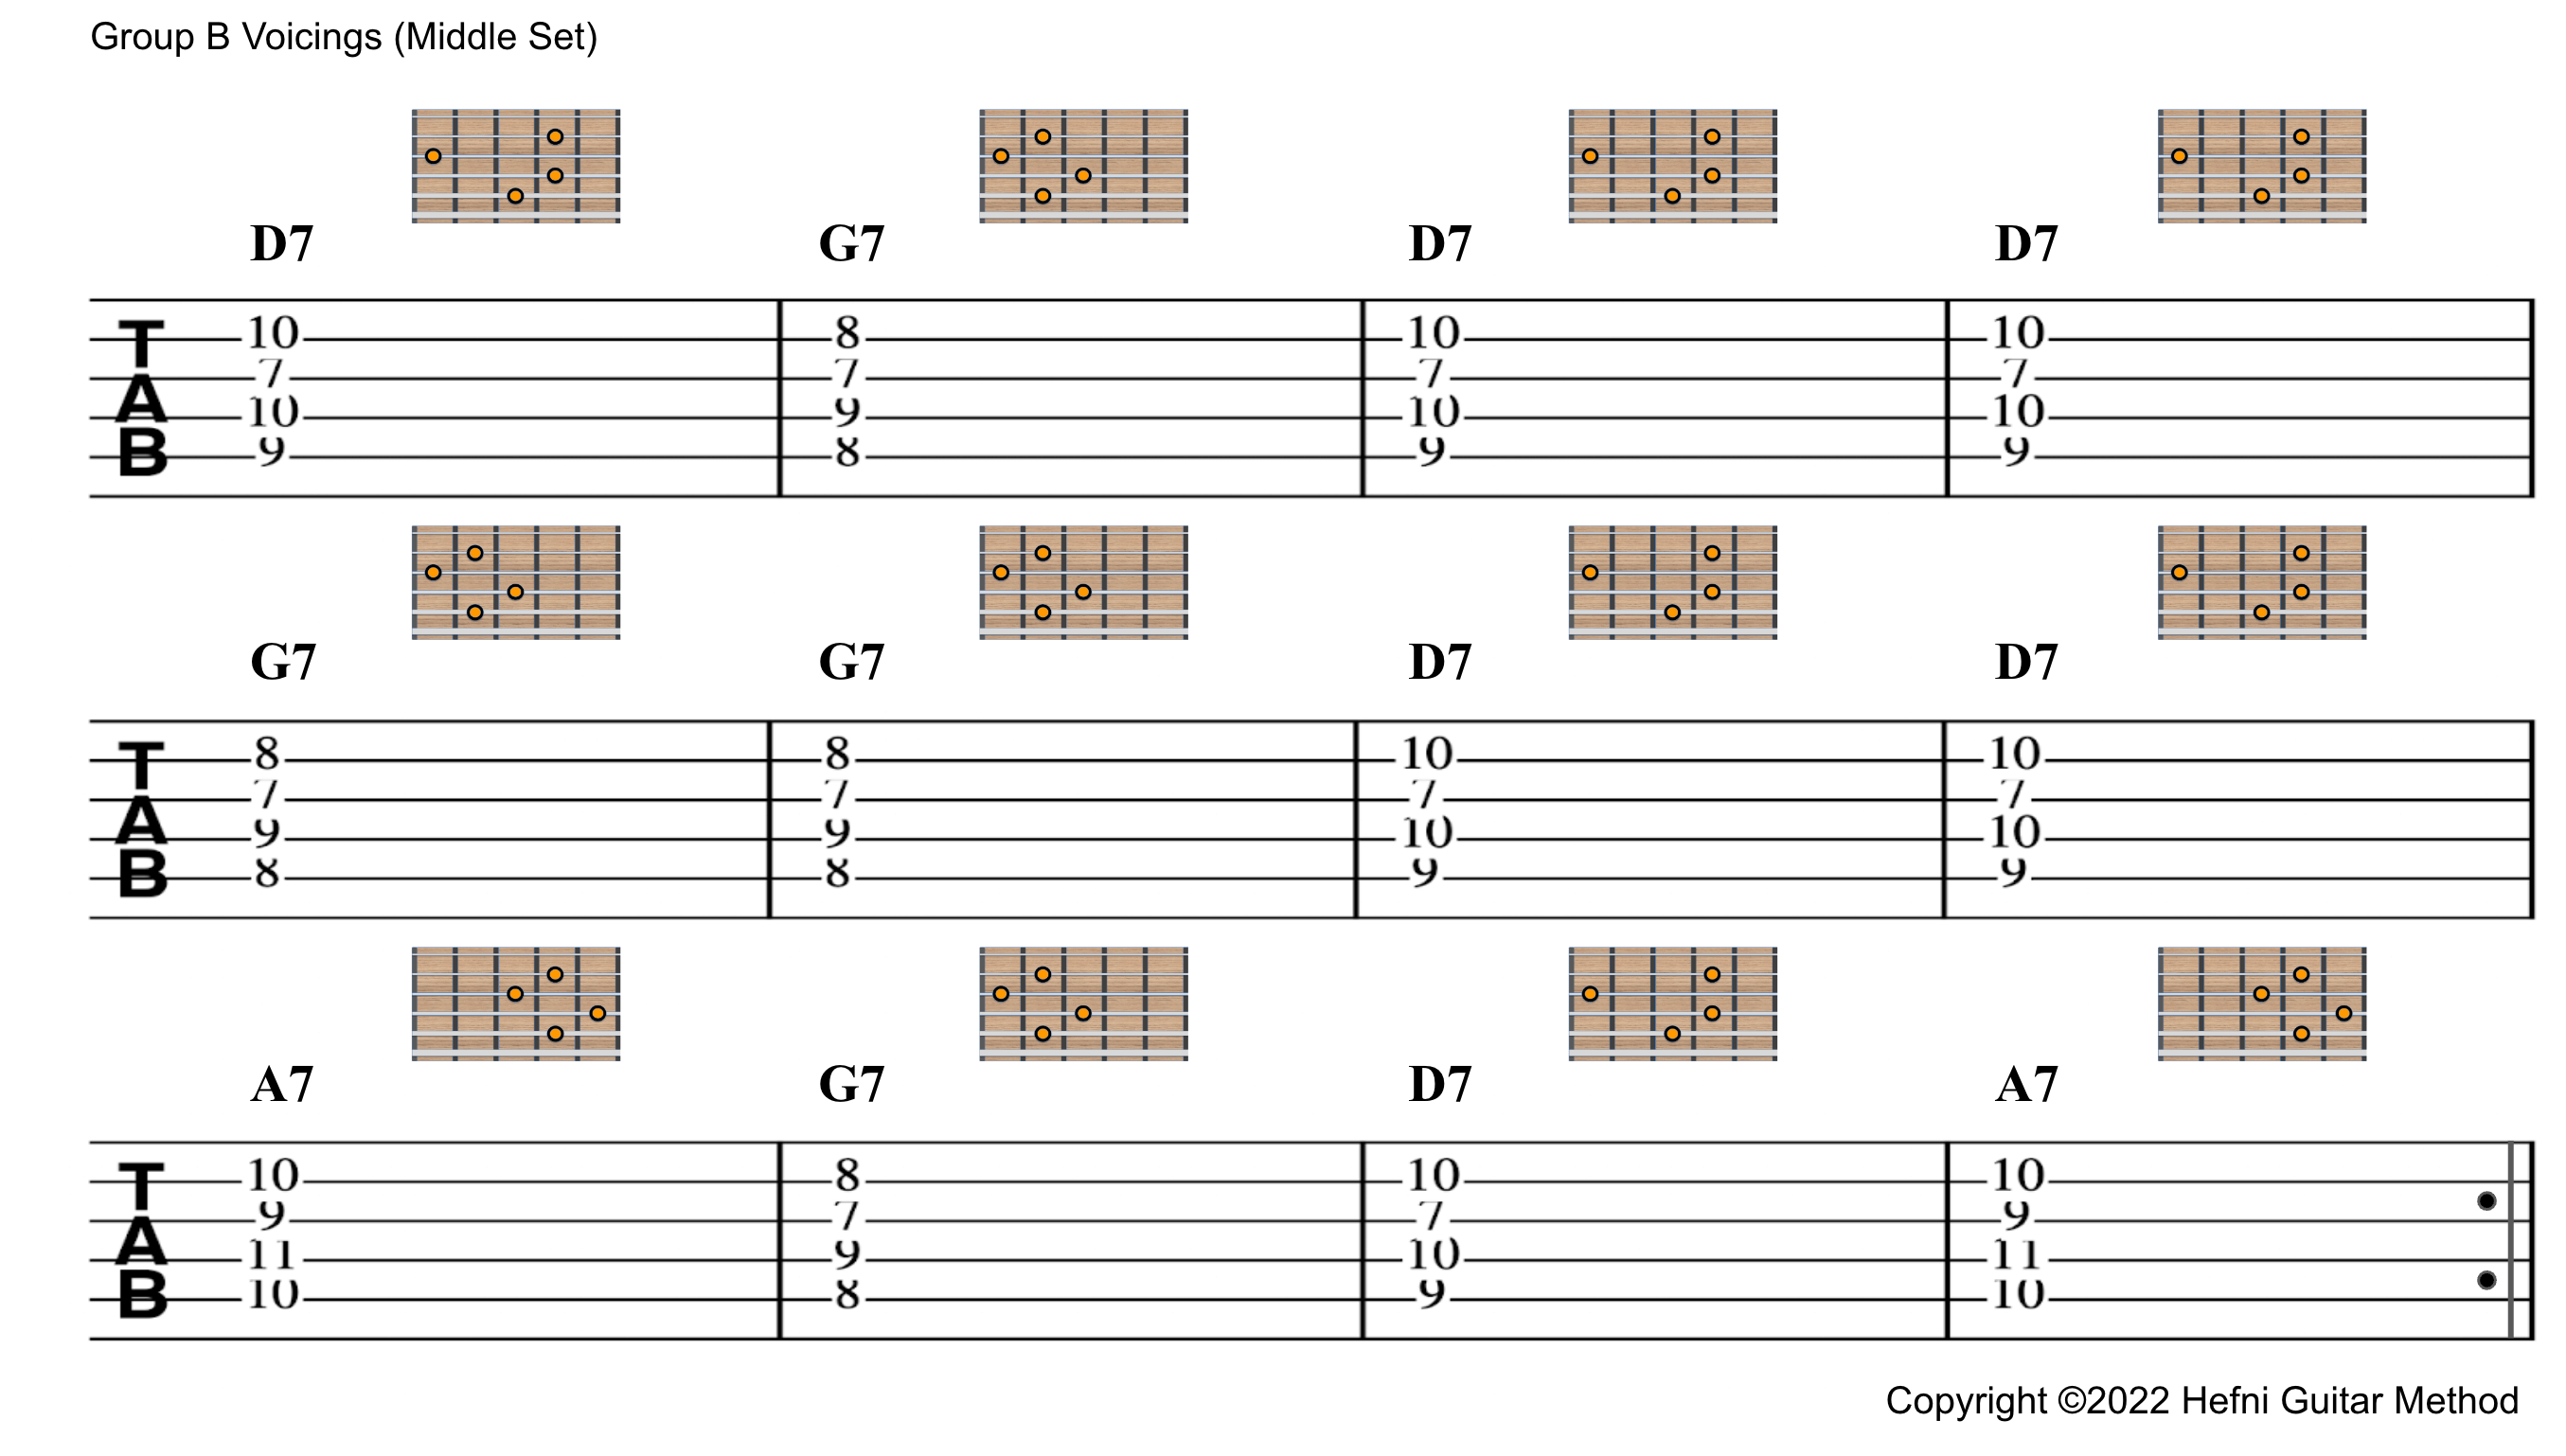
In this lesson, we will explore the next group of voicings on the middle strings between the 7th and 11th frets. As before, there are only two chord shapes for the 3 chords in this lesson.
This week’s lesson introduces uncommon chord fingerings which you may not have encountered before. Naturally, these are inversions of the chords from the previous lesson. The voicings were chosen to maintain proper voice leading when changing the chords.
Click on the video below to watch the lesson.
Learning Aids
The TABs and chord diagrams for the Lesson 2 are presented below.

Primary Takeaways
The main takeaways of lesson 2 are as follows:
1. 2 chord shapes, 3 chords
As in the previous lesson, we use the same shape for the VI and V chords albeit 2 frets apart. This makes it easier to learn the chord as there are less to learn. We can explore other variations after mastering these 12 voicing groups. As for right now, the main aim is to ingrain muscle memory with the chord shapes and shape changes.
2. Common Finger Technique 1: “Fixed Pivot”
Here I will introduce what I call the common finger technique. This technique uses fingers which are common for two adjacent chords to anchor your fretting hand to the fretboard. Therefore, this provides stability to pivot the remaining fingers to their new locations. For instance, in bars 1 to 4, the index finger of our fretting hand is fixed on the 7th fret the entire time. If we do not lift this finger every time we change chords, it functions as a ‘fixed pivot’ while our other fingers change position.
3. Common Finger Technique 2: “Movable Pivot”
In bar 1, the middle finger of our fretting hand holds the 9th fret on the A string whereas in bar 2, it is on the 8th fret. In other words, it only slides one fret down the A string. If our index finger is fixed on the 7th fret as pointed out above, we can simply slide the middle finger from the 9th to the 8th fret. Do not lift the middle finger off the string but instead release the finger pressure and slide down the string instead. Therefore, the middle finger functions like a movable pivot while the index finger, is the fixed pivot.
Slide the middle finger back up one fret to change back to the I chord in bar 3.
Understanding Objectives in Blues Chords Workshop Lesson 2
To better improve our learning, we should lay down a structure in order to establish ‘what‘ we are trying to learn. However, we sometime do not emphasis enough the ‘why’s’ and ‘how’s’ in going about this. If we better understand the latter 2, we get a bigger picture as to the objective’s of our learning.
The end goal of this blog is to teach chord tone soloing to guitar players. However, to get there, a strong foundation in the chords is necessary. Furthermore, learning how to play a chord or a chord progression at one location is not adequate to provide the needed proficiency for soloing throughout the neck. Therefore, we learn different variations of the same progression at different fret locations to eventually develop total mastery in chord tone soloing.
Also, I have observed that if we have a long term vision for the learning, this allows us to plan our learning into short-, medium- and long-term objectives. This therefore allows us to tackle different break up the content in terms of difficulty from the simple in the early stages to the complex at the later stages.
Focused Approach to Learning
There are various forms of the blues but we will focus on the standard 12-Bar blues with quick change to the IV chord in bar 2. This helps us familiarise the fingering changes much more quickly. We also omit at this stage, things like the turnaround at the end of the 12 bars in order to focus solely on the chord progression voicing groups at different positions. Once we have mastered all the voicing groups, this method will explore the different embellishments available.
